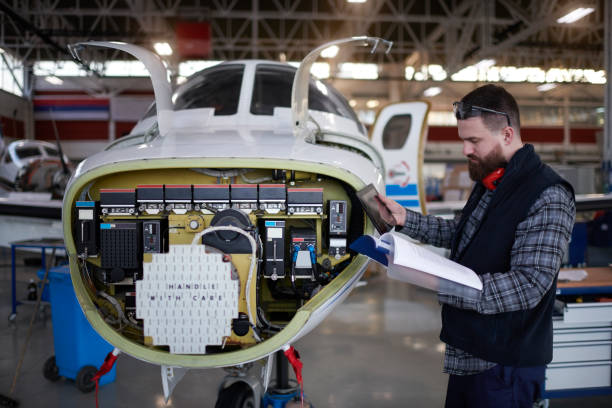
Flying is freedom. It creates a feeling that cannot be duplicated. Aircraft that start from the best position eventually become outdated with time. Pilots recognize the crucial importance of staying current with rapidly evolving technological advancements. Several strategic equipment modifications will significantly enhance safety, as well as comfort and operational performance. Breaking down the process into manageable steps helps make the entire process more manageable despite its initial overwhelming nature.
Step 1: Know What You Want to Improve
Begin by identifying the most important aspects. Is better navigation the goal? Maybe smoother handling? The time has come to replace an outdated autopilot system. The clarity about required improvements streamlines the entire upgrade process.
Create a written record of all outdated elements. Consult with other pilots and maintenance personnel to gain a broader perspective. The expertise of maintenance crews often reveals problems that standard inspections might miss. The focus should be on enhancing flight safety and comfort rather than simply acquiring new technology.
Step 2: Set a Realistic Budget
Aircraft upgrades can get expensive fast. It is tempting to dream big, but setting a clear budget from the start keeps things grounded. Consider not just the parts but the installation, testing, and potential downtime. Some upgrades may seem small, but they require a significant amount of labor to install.
A well-planned budget ensures that upgrades bring real value. Sometimes, it’s better to make a few key upgrades right away rather than trying to do everything at once.
Step 3: Choose the Right Equipment
Once the needs and budget are clear, it’s time to choose the right equipment. Not every piece of gear is compatible with every aircraft. What works well in a small Cessna may not be right for a larger twin-engine plane. Compatibility matters.
For example, pilots looking to upgrade their autopilot systems might consider a Garmin®️ GFC 600 Installation Kit. It’s designed to work with various types of aircraft and can significantly enhance handling and stability. Choosing proven, well-supported gear avoids headaches later on.
Talk to trusted avionics shops or installers. They can offer advice on what works best for specific aircraft models. It is always better to go with systems that are popular and have lots of support available.
Step 4: Find the Right Shop or Technician
Picking the right person to do the work is just as important as choosing the right parts. Always look for certified shops with experience working on similar aircraft. Reviews and word-of-mouth recommendations are valuable here.
Ask plenty of questions. A good shop will take the time to explain the process clearly and thoroughly. They will give a realistic timeline and cost estimate. Good communication now saves a lot of trouble later.
Remember, aviation upgrades are a partnership. Trust between the pilot and technician makes everything go more smoothly.
Step 5: Understand the Installation Timeline
Aircraft upgrades do not happen overnight. Some jobs take days. Others might stretch into weeks, depending on complexity and parts availability. It’s smart to plan for the aircraft to be down longer than expected, just in case.
During installation, inspections, test flights, and adjustments may be required. These are all normal parts of the process. Patience is key here. Rushing only leads to mistakes.
Some pilots schedule upgrades during slower flying seasons to avoid missing out on important trips.
Step 6: Post-Installation Testing and Training
Once the upgrades are installed, testing begins. This is where the magic happens. Test flights help make sure everything works as promised. Pilots should also plan to spend time learning the new systems.
Even experienced flyers need practice when new equipment changes how the plane behaves. Some shops offer brief training sessions. Others recommend working with a certified flight instructor for a few hours. Either way, learning the systems properly builds confidence and safety.
Step 7: Keep Documentation in Order
Every upgrade comes with paperwork. Updated aircraft logs, certification papers, and equipment manuals must be filed properly. These documents are crucial if the aircraft is ever sold. They also make maintenance easier in the long run.
Good shops will handle most of the paperwork, but it’s wise to double-check that everything is complete and accurate. An organized logbook reflects a well-cared-for aircraft. It shows pride of ownership.
Conclusion
Upgrading an aircraft is exciting. It breathes new life into something already cherished. Taking the time to do it carefully, with the right planning, makes a huge difference. From choosing the right equipment to learning how to use it, every step brings a new level of enjoyment and confidence to flying. An upgraded aircraft is not just about having the latest technology; it’s also about having the best technology. It’s about making every flight smoother, safer, and more connected to the sky.


